How to install Backtrack with Virtualbox
HOW TO INSTALL BACKTRACK WITH VIRTUALBOX

tutorial I’m using Backtrack 5 R3 and VirtualBox 4.2 on Windows.
Before we get started…
- Download and install the latest version of VirtualBox here
- Download the latest version of Backtrack here
- If you’re running 64-bit, make sure you download the 64-bit version.
Once VirtualBox has been installed, you should see something like this:

First, you want to create a new Virtual Machine (out backtrack VM). Click on the new button to start creating your VM.

Hit the next button to continue.

Type the name of your VM, select Linux as the Operating System and Ubuntu (64 bit) as the version. If you’re running 32-bit, you’ll need to select the “Ubuntu” version that doesn’t have the 64-bit in the name. If you are running 64-bit, you can technically run both, but you’ll get moreperformance running the 64-bit version. The reason that you select Ubuntu is because currently Backtrack is not one of the options.
Hit next…

I usually change this from the default of 512 MB to 800 MB. You can really change this to whatever you want but I’ve ran into ram issue at 512MB so I tend to up it. Next

Create new Start-Up Disk. Next

I usually just use the default VDI. Next

I usually do dynamically allocated so I’m not taking up space that I don’t need to take up. This should be the default. Next

My default for this is 8 GB. I feel like this is way too much so I usually lower it to 2 GB. I have 2 TB, so if you have less memory and you’re concerned about memory you can probably do less, just keep in mind that you may run into issues once you start to do updates. If your planning on using Metasploit, which I highly recommend you do, you’ll need to update it and the updates especially can take up some space. Next
Once you’ve done all of this, you should see the new VM in the main VirtualBox admin.

Next, we want to launch the VM, to launch the VM select the newly created VM and hit the start button.

Next, because this is the first time we’re opening this VM, we have to import our BackTrack ISO. Next…

Click the Folder Icon to the right of the select box. From here, browse to the Backtrack ISO file that you downloaded. Hit Next…

This is basically a summary of what you just did. Hit Next…

Now that you’ve imported your ISO to the VM, VirtualBox should automatically load up the first BackTrack screen. If it doesn’t do it automatically and just closes, just select the VM and hit the start menu again.
Once you see this screen, just hit the enter button to continue to the next screen.

You should then get this screen, from here select the default which is “BackTrack Text” mode. Then his enter to continue. After hitting enter, Backtrack will start loading all of your hardware setting which should take less than a minute.

Once all of your hardware has been loaded and configured in backtrack, you’ll get the BackTrack Text Mode. If you’re a Terminal Wizard you can do everything you want to from here. I personally like to pull up the Graphical User Interface just because I like the look and feel of having some windows. In addition, there are some applications that require a GUI like Armitage that you just can’t use without the GUI.
To load of the GUI, type “startx” and hit enter. This should load up the GUI within about 30 seconds.

You should see something like this…

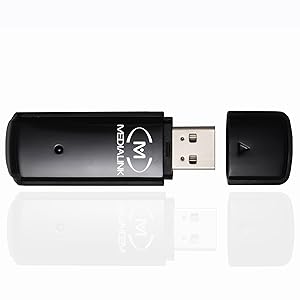
I use an external WIFI card. You may need to add it dropping down the USB devices, selecting your WIFI card. If it doesn’t come up right away, you may need to start Backtrack and add your USB wifi card before Backtrack loads up the hardware settings.
If your looking to do any type of wireless sniffing / WEP or WPA you’ll need a wireless card that supports packet injection. The cheapest wifi card that I’ve found that supports packet injection was from amazon. My card is the Medialink- 150Mbps Wireless N USB Adapter and it’s worked great for me but any wifi card that supports packet injection should work.
If you want to bridge your internet from your main computer to the VM, right click on the “Two Monitor” icon in the right corner and select the “Network adapters” option.

From here make sure that the “Attached to:” field is NAT and the “Cable connected” option is checked.
src: watdafox


Post a Comment